Logs are critical for understanding what is occurring inside your Kubernetes cluster. Even while most apps come with a native logging mechanism, users in distributed and containerized environments (such as Kubernetes) will benefit from a centralized logging solution. That is because they must collect logs from many applications in various log formats and transfer them to a logging backend for storage, processing, and analysis. Kubernetes includes all of the essential resources required to achieve such functionality.
In this article, we'll look at Kubernetes' logging architecture and show how to use Fluentd to collect application and system logs. We also go over some Fluentd configuration specifics to teach you how to set up log sources, match rules, and output destinations for your custom logging system. Let's get started.
Some basics first
Docker containers in Kubernetes write logs to standard output (stdout) and standard (stderr) error streams. Docker redirects these streams to a logging driver configured in Kubernetes to write to a file in JSON format. Kubernetes then exposes log files to users via kubectl logs command.
However, deleting a pod from the node permanently deletes all connected containers and logs. The same thing happens when a node dies. In this circumstance, users can no longer access application logs. To avoid this scenario, container logs should have their own shipper, storage, and lifespan, independent of pods and nodes. Kubernetes does not have a native storage solution for log data, but you can easily integrate your favorite logging shipper into the Kubernetes cluster using the Kubernetes API and controllers.
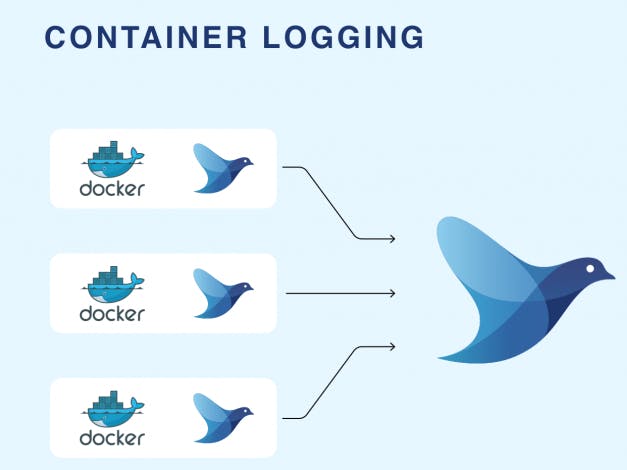
In this article, we will be shipping logs be deploying a node-level logging agent that runs on every node.
What the hell is a node-level logging agent?
This is an agent that runs on every node in your kubernetes cluster. Production clusters normally have more than one nodes spun up. If this is your case, you’ll need to deploy a logging agent on each node.
The simplest method to accomplish this in Kubernetes is to build a unique sort of deployment called DaemonSet. The DaemonSet controller ensures that each node in your cluster has a copy of the logging agent pod. The DaemonSet controller will additionally check the cluster's node count on a regular basis and start/stop a logging agent if it changes. The DaemonSet structure is ideal for logging solutions because it requires just one logging agent per node and eliminates the need to alter the applications executing on the node.
Deploying FluentD as a DaemonSet
We used the DaemonSet and the Docker image from the fluentd-kubernetes-daemonset GitHub repository. There you can also find Docker images and templates for other log outputs supported by Fluentd such as Loggly, Kafka, Kinesis, and more. Using the repository is the simplest way to get you started if you don’t know much about Fluentd configuration.
This article assumes you have the following:
- A running Kubernetes cluster,
- kubectl command line tool.
Step 1: Grant permissions to FluentD
Fluentd will receive logs from both user apps and cluster components such as kube-apiserver and kube-scheduler, thus we must grant it certain permissions. Here we will create a ServiceAccount and grant it permissions to read, list, and watch pods and namespaces in your cluster.
Create a file called rbac.yml like this
apiVersion: v1
kind: ServiceAccount
metadata:
  name: fluentd
  namespace: kube-system
---
apiVersion: rbac.authorization.k8s.io/v1
kind: ClusterRole
metadata:
  name: fluentd
rules:
- apiGroups:
  - ""
  resources:
  - pods
  - namespaces
  verbs:
  - get
  - list
  - watch
---
kind: ClusterRoleBinding
apiVersion: rbac.authorization.k8s.io/v1
metadata:
  name: fluentd
roleRef:
  kind: ClusterRole
  name: fluentd
  apiGroup: rbac.authorization.k8s.io
subjects:
- kind: ServiceAccount
  name: fluentd
  namespace: kube-system
Step 2: Create a FluentD configuration
Your FluentD process needs a configuration to understand how to route Kubernetes logs. In this example you will see the configuration to send data to CtrlB platform, however you can replace this with the destination of your choice. Save this file as fluent.conf
<source>
  @type tail
  @id in_tail_container_logs
  path /var/log/containers/*.log
  pos_file /var/log/fluentd-containers.log.pos
  tag kubernetes.*
  read_from_head true
  <parse>
    @type none
  </parse>
</source>

<match **>
  @type http
  endpoint "<your-https-endpoint>"
  open_timeout 3
  json_array true
  headers {"X-CtrlB-License":"<your-license-key>"}
  <buffer>
    @type memory
    flush_mode immediate
  </buffer>
</match>
Step 3: Create a configuration to deploy pods
This is the configuration to deploy FluentD as a daemonset so that Kubernetes can configure a FluentD process with each of your nodes. Save this file as fluentd.yml
apiVersion: apps/v1
kind: DaemonSet
metadata:
  name: fluentd
  namespace: kube-system
  labels:
    k8s-app: fluentd-logging
    version: v1
    kubernetes.io/cluster-service: "true"
spec:
  selector:
    matchLabels:
      name: fluentd
  template:
    metadata:
      labels:
        name: fluentd
    spec:
      serviceAccount: fluentd
      serviceAccountName: fluentd
      tolerations:
      - key: node-role.kubernetes.io/control-plane
        effect: NoSchedule
      - key: node-role.kubernetes.io/master
        effect: NoSchedule
      containers:
      - name: fluentd
        image: fluent/fluentd-kubernetes-daemonset:v1-debian-forward
        env:
        - name: FLUENT_UID
          value: "0"
        resources:
          limits:
            memory: 200Mi
          requests:
            cpu: 100m
            memory: 200Mi
        volumeMounts:
        - name: config-volume
          mountPath: /fluentd/etc/fluent.conf
          subPath: fluent.conf
        - name: varlog
          mountPath: /var/log
        - name: varlibdockercontainers
          mountPath: /var/lib/docker/containers
          readOnly: true
      terminationGracePeriodSeconds: 30
      volumes:
      - name: config-volume
        configMap:
          name: fluentd-conf
      - name: varlog
        hostPath:
          path: /var/log
      - name: varlibdockercontainers
        hostPath:
          path: /var/lib/docker/containers
Step 4: Create a config map for your config file:
kubectl create configmap fluentd-conf --from-file=fluent.conf --namespace=kube-systemStep 5: Deploy the Kubernetes configs
kubectl create -f rbac.yml && kubectl create -f fluentd.ymlConclusion
In this article, we showed how Fluentd can easily centralize logs from many apps and deliver them to Elasticsearch or another output destination. Unlike sidecar containers, which must be generated for each application in your cluster, Fluentd's node-level logging simply requires one logging agent per node.